
Every time I use the Azure portal, I am impressed with the amount of features that it offers, and equally impressed with how hard Microsoft made it to do some fairly basic tasks.
We had a database in Azure that we wanted to move to non-Azure server. You would think that backing up a database to a file would be a simple task. Well it wasn’t.
Aside: Don’t be tempted to use the SSMS Import-Export wizard to do this. I did that on another database, and thought all had worked until a couple of days later when the client reported an error. After some very frustrating hours trying to work out why I was getting an exception about a null primary key (which it clearly wasn’t), I discovered that when the wizard created the new database, it had missed out some vital parts, like setting Identity on the primary keys!
After going round in circles on the portal, I discovered that there is a really quick and easy way to this using tools you probably already have on your PC.
When you install SQL Server Management Studio, it also installs Azure Data Studio (ADS). I’d never looked at this before, but now wish I had. It’s a bit like SSMS but for Azure, and makes life sooo much easier.
Exporting your database from Azure
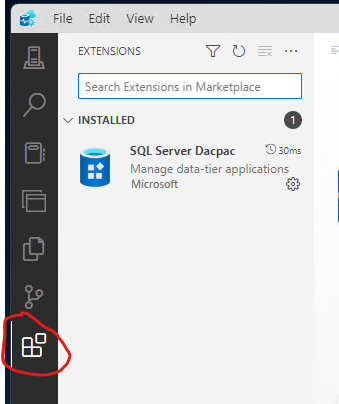
To backup an Azure database, you need to install an extension to ADS. Click the Extensions icon (bottom one, highlighted with a fab hand-drawn squiggle in the screenshot) and then type “SQL Server bacpac” in the search box. As you can see, I already have it installed…
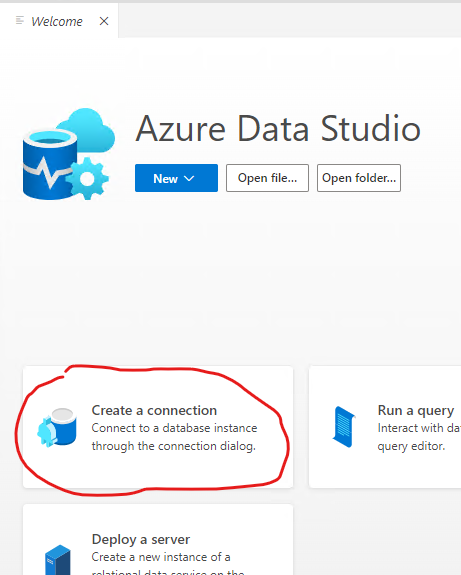
After installing that, you need to connect to the Azure server that has your database. On the Home page (which might be titled Welcome) click the “Create a connection” button…
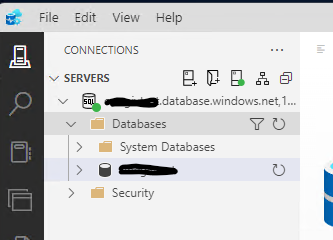
Fill in the details in the panel that pops up, and click the Connect button. This should connect you to the server, and allow you to see your database(s)…
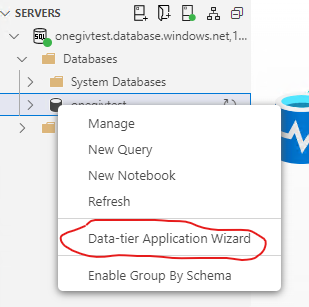
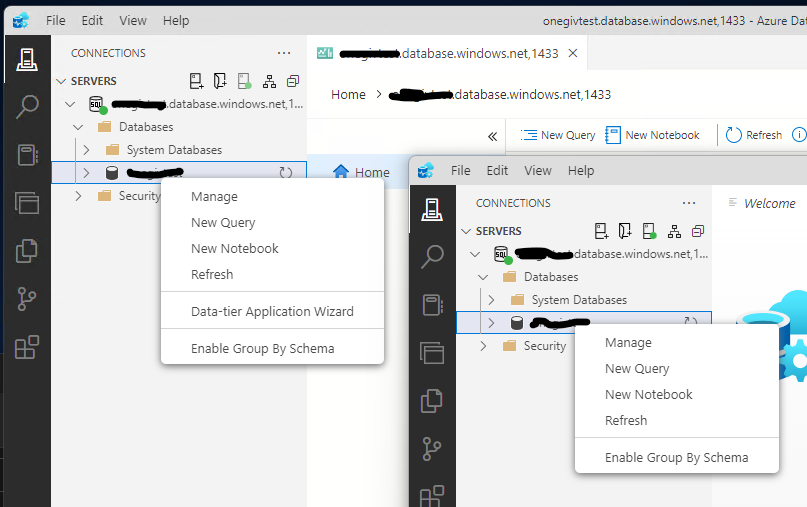
Right-click the database you want to export and choose “Data-tier Application Wizard”…
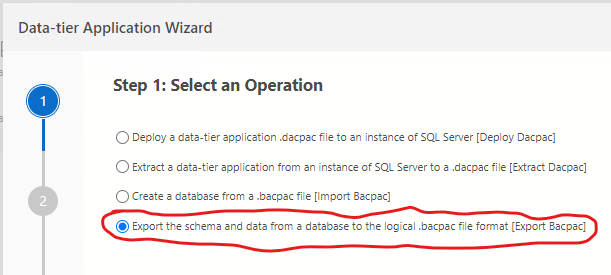
Next, you need to choose the operation you want to perform. To export the database, choose the last option…
In the next step, set the file location (the server and database will already be populated, so you can leave those as they are) and click Next.
This gives you a summary of what you are about to do, which is pretty useless as it only reflects the three options in the immediately previous step!
Click Export, and ADS will go off and do its stuff. You’ll see the progress of the export in the Tasks panel.
Small warning
I first did this on my lap top, connected via Remote Desktop, and got myself all confused when I couldn’t see the bacpac backup file when looking at File Explorer on my main PC! Duh, been a long day.
I then tried the export again from my PC, but found that ADS didn’t have the “Data-tier Application Wizard” option…
I have exactly the same version of ADS on both machines, and both are running up-to-date installations of Windows 11, so I don’t know why the main PC didn’t show the option. I didn’t investigate further, as I already had by bacpac file by then, and needed to get it imported.
Importing your database to SQL Server
Start up SSMS and connect to the server where you want to install your database.
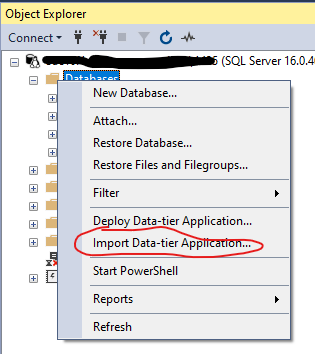
In the Object Explorer panel, right-click Databases and choose “Import Data-tier Application”…
Click past the “Hello, I just want to annoy you by telling you what this wizard does, even though you could figure it out for yourself” page and choose the bacpac file you saved earlier.
In the next step change the database name to whatever you want and click Next. You can then click through until it starts the import.
And that’s it! All took very little time, especially compared to the hours I wasted trying to work out how to do all of this in the Azure portal.
Be First to Comment